Recommendations
- Cork is a natural product. Differences in the structure and shades of planks occur naturally and cannot be accepted as valid grounds for complaints.
- The cork planks should be acclimated by opening the boxes and leaving in the middle of the room in which they are to be laid for 48 hours.
- Upon opening the boxes, check that all planks are in the proper condition for installation.
- Do not install cork floors in humid room spaces such as bathrooms, saunas and laundry rooms.
- Always leave a gap of approximately 3/8″ between the edges of the flooring and perimeter walls to allow for possible expansion and movement.
- If the room in which the panels are to be installed had under floor heating, the surface must not exceed a temperature of 82 degrees.
- Under floor heating can lead to the formation of cracks in the cork during long heating periods.
Surface Preparation
- Should the floor surface require leveling, use a quick drying leveling plaster.
- Cement or cement-derivative floors should be made impermeable with 0.2mm thick polyethylene film in order to protect the panels from sub-floor moisture.
- Cork panels may be laid directly on top of PVC, linoleum or agglomerates.
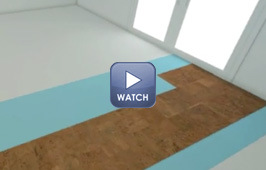
- After laying down the moisture barrier, you can choose to use a cork underlayer in order to improve the sound insulation. When fitting the underlayer, take care that the joins do not coincide with the joins of the moisture barrier.
- The laying of the cork panels is so easy that one almost regrets when the job is finished!
- You will need a hammer, saw, crowbar or pinchbar with protruding edge and wooden wedges. (Tip: We use a cut piece of the cork floor as a wooden wedge).
Installation -Important Tips To Remember
- 25-30 linear feet is the maximum length recommended before a break in the flooring is required
- Make sure you have acclimated your floor in the room to which you are installing for a minimum of 48 hours.
- It is advisable to “shuffle” the boxes (take a plank from the top of each box and rotate to evenly distribute the natural color).
- To achieve a clean cut, saw the pattern side down with a jigsaw and up with the hand or cross-cut saw.
- Check planks and do not install any defective material or they will not be covered on warranty.
- Stagger all planks on installation (aka as brick lay install).
- Because humidty in rooms can vary, the floor must be able to expand in all directions. The greater the surface area, the greater the room for expansion is required. It must be able to expand and contract on ALL sides. To facilitate this, an expansion gap should be provided at the room’s perimeter and also around any pipes and thresholds. With larger surface areas, a wider gap must be provided. Where possible provide expansion gaps for example under doors. These will be covered by a profile that is not fixed to the cork floor but rather the base floor.
- Install the panels, preferably in the same direction as the longest wall. Start installing the floor on one corner or in the middle of the area. You can work from left to right or right to left. The easiest way of installing the floor is using the tongue into the groove.
- Position the plank into the previously installed plank at an angle. Move the plank to be fitted slightly up and down at the same time exerting forward pressure. The plank will then click into place. In some cases, the planks cannot be rotated into one another, for example, under a door frame, etc. In this case, the planks can also be fitted laying flat. IMPORTANT, to do this you need a hammer and tapping block, otherwise you may damage the panels to be fitted. Use a number of slight taps until the planks click into place. Do not try to fit the planks together with one hit.
- Continue with the rows in this manner. On the final row, there should be an expansion joint of approximately 3/8″ between the row and the wall. In doing this, remember you have to saw off the long edges of the final row of planks, to fit. Place these planks one by one next to the planks of the last row and tap the long edges together using the crowbar and hammer. The short edges can be tapped together using a tapping block.
- After installation, you can immediately walk on the floor. This is one of the major benefits of cork floating floor.
Finishing
- Under normal use, no additional finishing is required for your APC cork flooring. But in the case it is deemed necessary to further protect the seams against water infiltration or humidity, another coat of varnish or urethane may be applied to the flooring. Only use a high quality hardwood flooring water-based or oil based polyurethane varnish (see manufacturer’s instructions on label for product usage).
- When the finish begins to show signs of wear, you may clean the floor and apply a new coat.
Maintenance and Cleaning
- The type and frequency of maintenance to be applied to APC CORK flooring will vary depending on the type and amount of traffic on the floor.
- Sweep, vacuum or clean with a damp mop or cloth on a regular basis.
- Never pour water directly on the cork floor.
- Remove liquids and spills immediately.
- Protect floor covering by using felt protectors on chairs and other pieces of furniture.
On a “need to” basis, it is recommended that the floor be cleaned with a recommended floor cleaning solution. Example: A hardwood cleaner or any neutral floor cleaner (follow manufacturer’s recommendation).
Note: Exposure to UV light and sunlight will cause color variations to cork. This is normal and not a manufacturing Defect. Area rugs and large furniture will block light exposure and cause uneven coloration. To minimize this, furnishings and floor coverings should be moved periodically.


